Implementing JaCoCo Code Coverage in Android Projects
Adding code coverage analysis to your Android project is important for its trustworthiness and ease of upkeep. JaCoCo, a popular code coverage tool, gives helpful reports to show how much code is covered by tests. In this guide, we'll help you set up JaCoCo in your Android project, so you can use it to measure code coverage. By doing this, you'll be able to thoroughly check your unit test coverage, helping you make smart choices to improve your project's quality and steadiness. Let's get started!
I assume that you already have a project to which you want to add a coverage report.
Final goals:
- add and configure JaCoCo to your project,
- produce html report for Unit Tests.
Setting up JaCoCo in Your Android Project
To get started, add the JaCoCo plugin to your Android project. Create a module-jacoco.gradle file in the root directory of your project with the following content:
apply plugin: 'jacoco'

tasks.register('codeCoverage', JacocoReport) {

        // The reports to be generated by this task.
    reports {
        html.required.set(true)
    }

        // Source sets that coverage should be reported for. Please be aware it's
    // adjusted to our project and set classes which best fits to your needs.
    classDirectories.setFrom(
            fileTree(project.buildDir) {
                include("**/tmp/kotlin-classes/debug/**")
                exclude(
                        '**/R.class',
                        '**/R$*.class',
                        '**/BuildConfig.*',
                        '**/Manifest*.*',
                        '**/airbnb/**/*.*',
                        "**/*Screen*",
                        "**/Showkase*",
                        "**/theme/Theme*",
                        "**/theme/Type*",
                )
            }
    )

        // Source sets that coverage should be reported for.
    sourceDirectories.setFrom(
            fileTree(dir: project.projectDir, includes: ["src/main/java/**", "src/main/kotlin/**"])
    )

        // Collection of execution data files to analyze. Please be aware it's adjusted to our project.
        // In the next step I wll show you how to find these files!
    executionData.setFrom(
            fileTree(dir: "${buildDir}/outputs/unit_test_code_coverage", includes: ["**/*.exec", "**/*.ec"])
    )
}
In the build.gradle file for your module, add the following configuration:
apply from: '../module-jacoco.gradle'

android {
    buildTypes {
        debug {
            enableUnitTestCoverage true
            testCoverageEnabled true
        }
    }
}
When setting files to executionData you should set them according to where they are generated in your project. Since we set testCoverageEnabled true, you should find them in the same path as in the example, which is app/build/outputs/unit_test_code_coverage/debugUnitTest/testDebugUnitTest.exec.
Now you can run coverage for unit tests locally!
- Build the project.
- Run in the terminal
./gradlew testDebugUnit. - Run in the terminal
./gradlew codeCoverage.
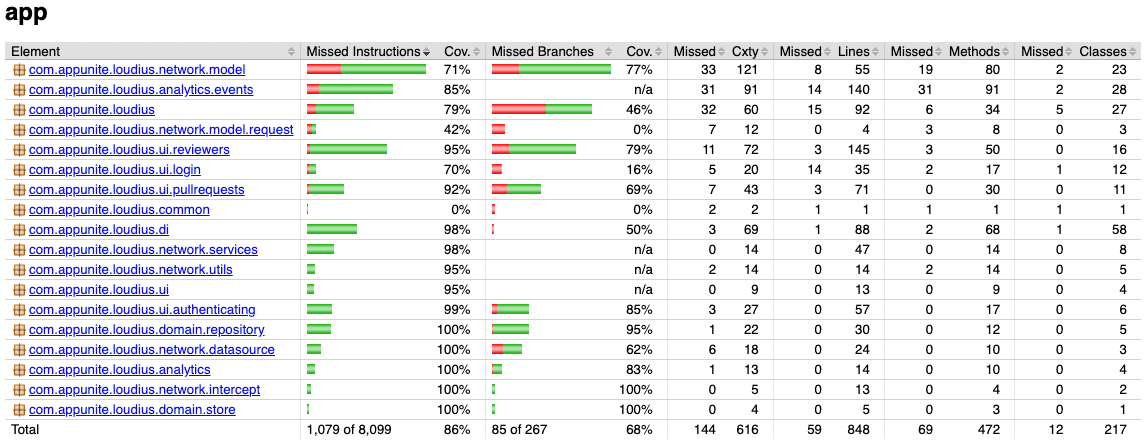
Now check the app/build/reports/jacoco/codeCoverage/html/index.html and open this file in the browser (I use Chrome and have no idea if the other works properly). You should see your first code coverage for unit tests!

You can check the entire project with JaCoCo implemented and more here.
Check out the second part, which is CI/CD for Code Coverage with GitHub Actions.
Conclusions
By using JaCoCo in your Android project, you get valuable information about how much of your code is tested. This tutorial demonstrated how to set up JaCoCo to generate detailed test coverage reports. Its usage can facilitate the establishment of a robust testing routine in your development process, leading to improved and more reliable Android apps. Keep improving your tests with JaCoCo, and aim for high-quality Android projects. Happy testing!
